


Seasonal Freebie
Free Valentine’s Day Gift Tags for Students
Skip the sugar, while saving time and money, when you download these FREE Valentine’s Day gift tags for students!
⎯ Seasonal ⎯
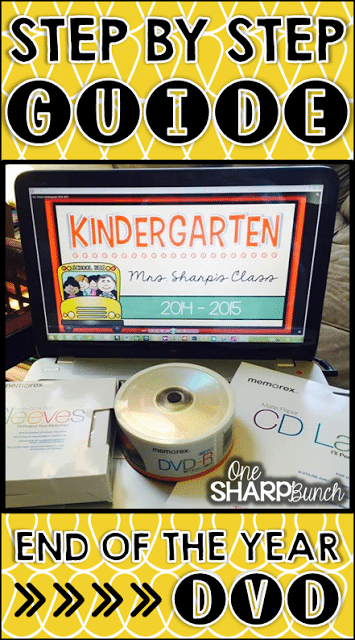
End of the Year Video Tutorial {Part 1: Movie Maker}
Share this Post
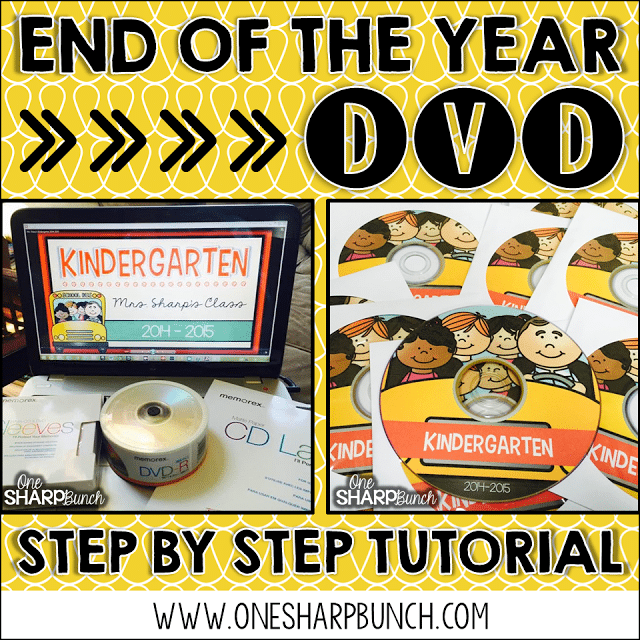
Hi, friends! Can you believe the end of the year is already upon us?!? Our last day isn’t until the second week in June, but I know many of you will be finishing up the year soon. Last year, I decided to make an end of the year video that we would watch at our end of the year celebration. I also made a copy of this video in DVD format for each child. It was a huge hit! However, if I am being completely honest, this was the first time I had ever used Windows Live Movie Maker and I had an extremely difficult time figuring out how to convert my movie to a DVD that the kiddos could watch at home. With that being said, I thought a step-by-step end of the year video tutorial would be helpful for all of you!
The images below contain the basic steps for creating a video with Windows Live Movie Maker compatible with Windows 8, 8.1 or 10. For more detailed instructions, watch the video at the end of this post!
End of the Year Video Tutorial: Pictures
Inserting Pictures
To insert pictures into Windows Live Movie Maker, click on the “Add videos and photos” buttons. Then, choose the location where you have saved your pictures. Choose multiple pictures at time by holding down the ctrl key.
After you insert the pictures, rearrange the sequence of the pictures by dragging them to the desired location.
Recommended Resources:

Digital End of the Year Activities for Google Slides

End of Year Digital Activities, Awards, Memory Book, & Theme Days

Top 10 Digital Memory Book for the End of the Year

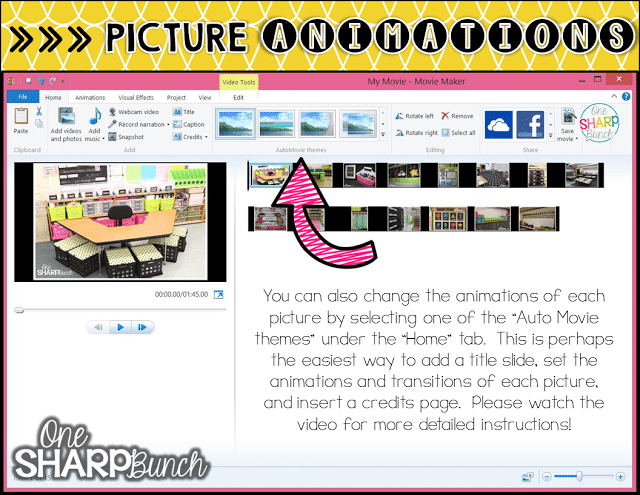
Picture Animations
You can also change the animations of each picture by selecting the “Auto Movie themes” under the “Home” tab. This is perhaps the easiest way to add a title slide, set the animations and transitions of each picture, and insert a credits page.
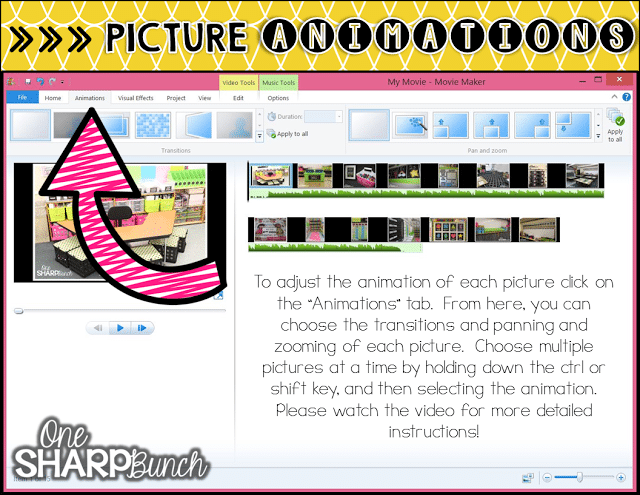
To adjust the animation of each picture, click on the “Animations” tab. From here, you can choose the transitions and panning/zooming of each picture. Choose multiple pictures at a time by holding down the ctrl or shift key while choosing the pictures, and then selecting the animation.
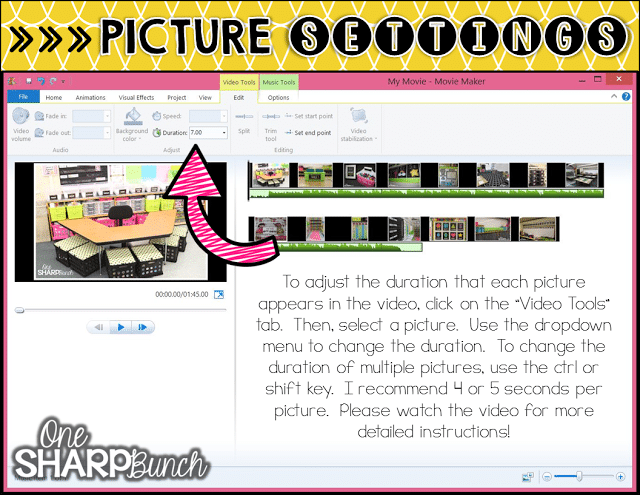
Picture Settings
To adjust the duration that each picture appears in the video, click on the “Video Tools” tab. Then, select a picture. Use the dropdown menu to change the duration.
To change the duration of multiple pictures, use the ctrl or shift key while highlighting each picture. I recommend 4 or 5 seconds per picture.
End of the Year Video Tutorial: Music
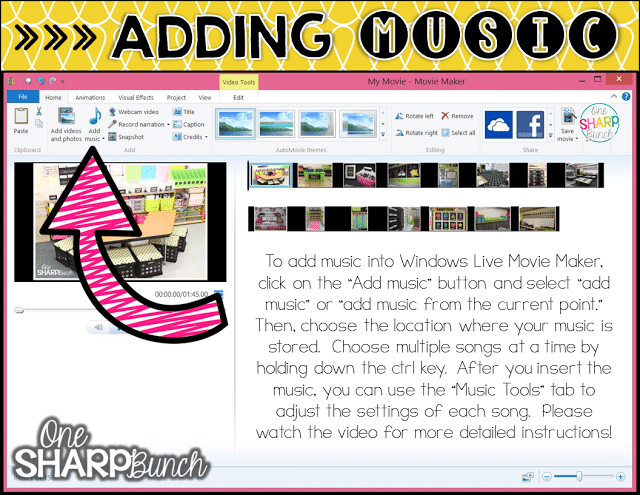
Adding Music
To add music into Windows Live Movie Maker, click on the “Add music” button and select “add music” or “add music from current point.” Then, choose the location where you have stored your music. Choose multiple songs at a time by holding down the ctrl key.
After you insert the music, you can use the “Music Tools” tab to adjust the settings of each song.
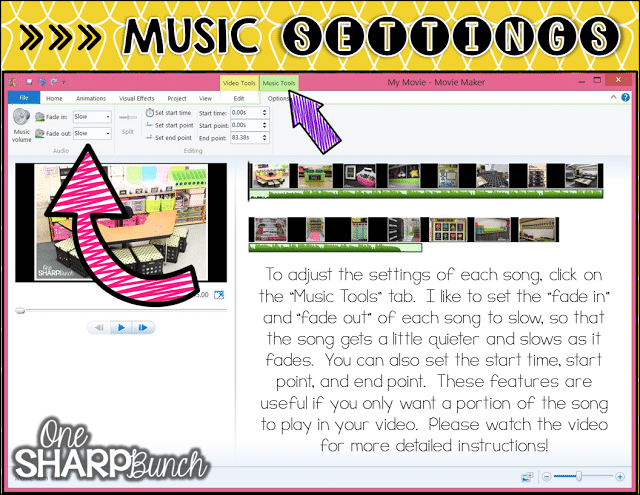
Music Settings
To adjust the settings of each song, click on the “Music Tools” tab. I like to set the “fade in” and “fade out” of each song to slow, so that the song gets a little quieter and slows as it fades.
You can also set the start time , start point and end point. These features are useful if you only want a portion of the song to play in your end of the year video.
End of the Year Video Tutorial: Title and Credits Slide
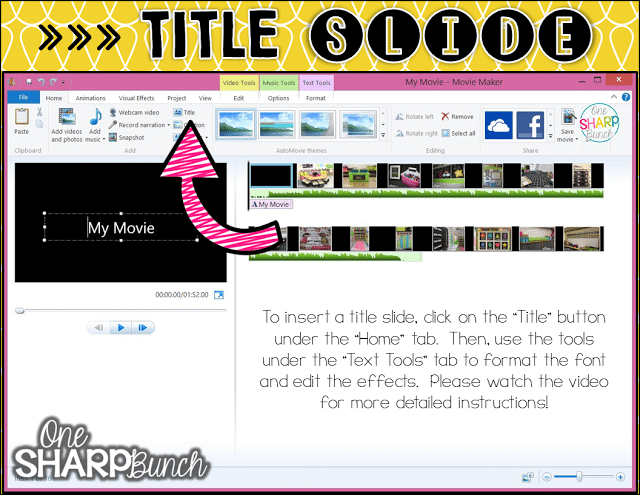
Title Slide
To insert a title slide, click on the “Title” button under the “Home” tab. Then, use the tools under the “Text Tools” tab to format the font and edit the effects.
You can also create a separate title slide in PowerPoint, save it as an image, and then, insert it at the beginning of your end of the year video.
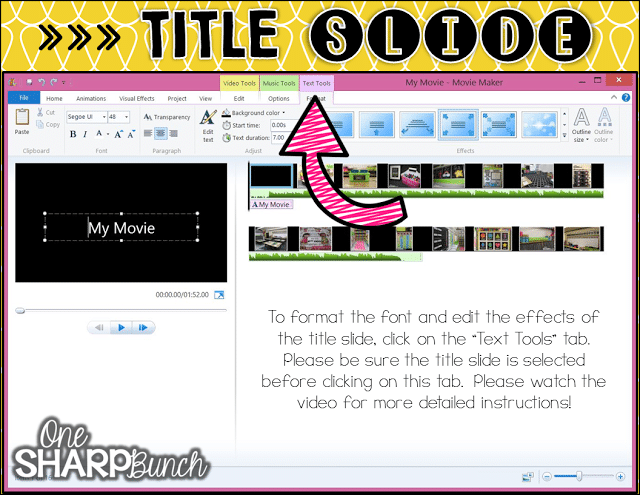
To format the font and edit the effects of the title slide, click on the “Text Tools” tab. Please be sure the title slide is selected before clicking on this tab.
Credits Slide
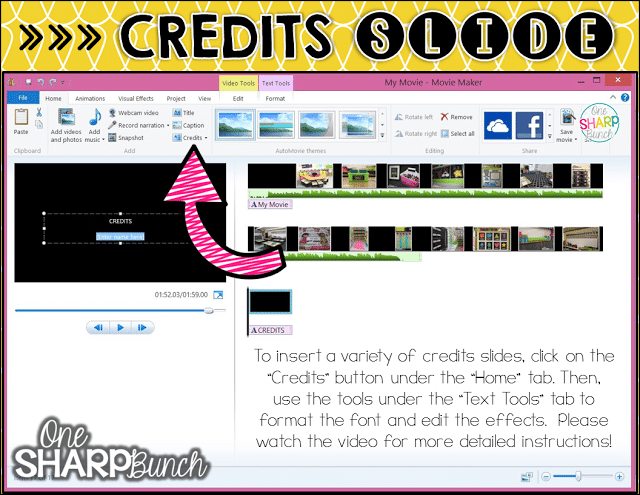
To insert a variety of credits slides, click on the “Credits” button under the “Home” tab. Then, use the tools under the “Text Tools” tab to format the font and edit the effects.

End of the Year Video Tutorial: Saving the Movie
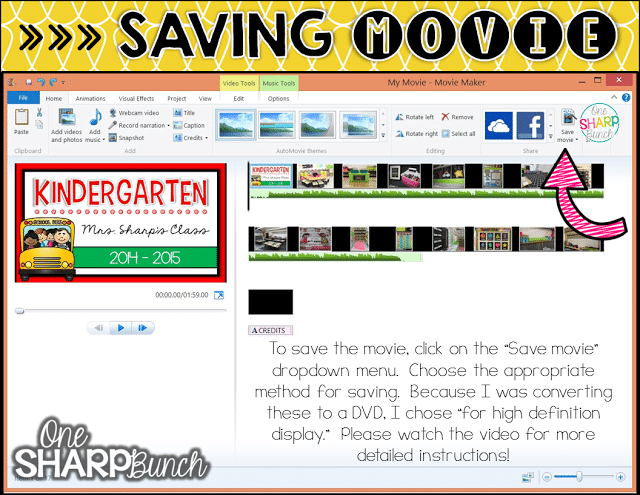
To save the movie, click on the “Save movie” dropdown menu. Choose the appropriate method for saving your file.
Because I was converting this video to a DVD, I chose “for high resolution display.”
Now, you can upload this video to a private YouTube channel, Google Drive or Dropbox. Simply share the link with your classroom families. You will want to make sure you are sharing on a private platform so that only your classroom families can access the video.
If you are looking for more in depth directions, please watch this video!
I hope this little tutorial will be helpful as you make your end of the year classroom video!
More End of the Year Ideas
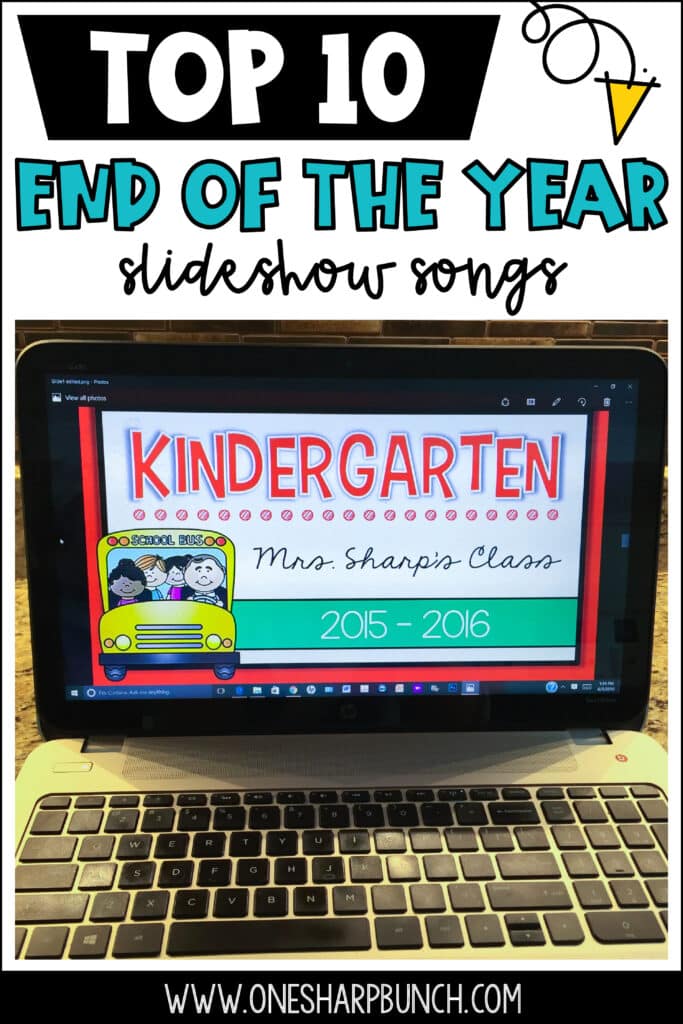
Find my Top 10 (actually 20 of my favorite) End of the Year Slideshow Songs here!
Learn how to plan the best end of the year awards ceremony here!

DON’T FORGET IT… PIN IT!
Share this Post

Ashley Sharp
As a dedicated Kindergarten teacher for nearly 20 years, I believe the words “fun, play, and creativity” can sit right alongside the words “developmentally appropriate, engaging, and rigorous.” Learning is meant to be fun and messy!
More Posts


12 responses to “End of the Year Video Tutorial {Part 1: Movie Maker}”
-
Thank you for the video tutorial! I wouldn't have dared to try this without it!
-
I would like to try and do a video for my kiddos this year. However, I have a few questions. Do you keep track of the number of photos of each kid in the show? Do you use multiple pictures of each kiddo doing the same thing? I am worried that each child may not have the same amount of photos!
Thanks,
Ashley -
This is incredibly helpful and well explained, Ashley! This will help me make my own product videos for my store. Thank you!
-
I would like to watch the converting to the dvd video. Have you posted it?
-
I have never put a cover on the CD I am totally going to do that this year!
-
Have you posted how to convert this movie to a dvd yet? I am at that point and can not figure it out. Thanks!
-
Have you made it into DVD yet??
-
[…] Use Windows Live Movie Maker to create a gift DVD for your kiddos. They will enjoy watching a slideshow of photos from the year set to music. You […]
-
I do this every year. I start promoting it in February. I ask for a $5 donation for the DVD. I try to make it about 30 minutes long and include any videos of the years programs. The donations pay for the food and decorations at pur end of the year celebration.
-
[…] Use Windows Live Movie Maker to create a gift DVD for your kiddos. They will enjoy watching a slideshow of photos from the year set to music. You […]
-
Hi there,
Would you be willing to share your templates for title page, transitions, etc…?Thanks so much!
-
[…] End of the Year Video Tutorial {Part 1: Movie Maker} […]


Leave a Reply