


Reading Freebie
Free CVC Word Sliders
Take a visual, kinesthetic, and auditory approach to orthographic mapping with these FREE multisensory CVC word activities!
⎯ Reading ⎯
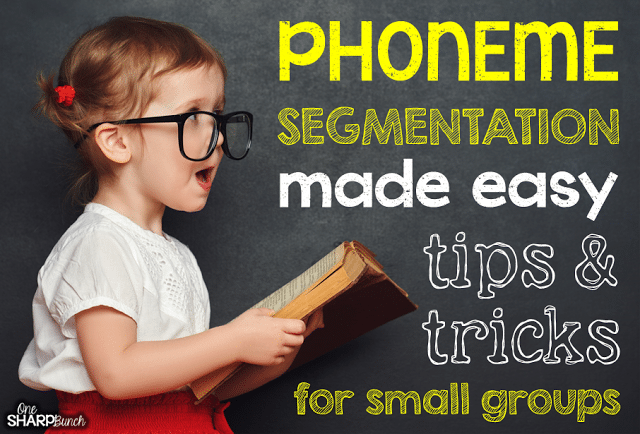
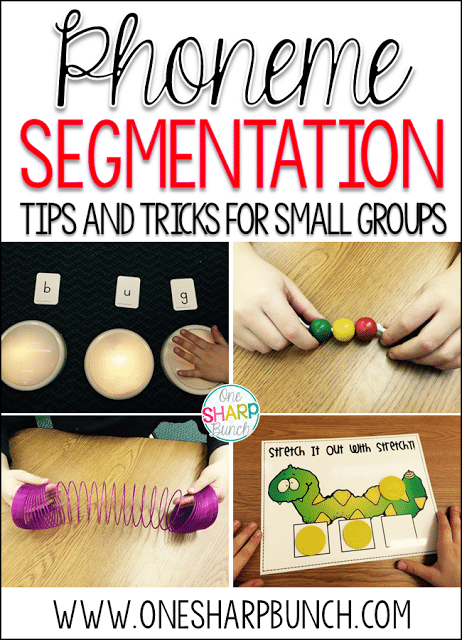
Phoneme Segmentation & Blending Made Easy
Share this Post
Hi, friends! Today, I’d like to talk about phoneme segmentation. Stretching out CVC words can be such a tricky skill for some of our little learners. You all know what I mean! Sometimes, identifying each sound through auditory means isn’t enough. Sometimes, our kiddos need some kinesthetic and visual learning to make that connection between letters and sounds. Sometimes, they need to manipulate the materials as they learn.
So go ahead and grab yourself a snack as you read how I make phoneme segmentation easy during my small group instruction!
This post contains affiliate links for your shopping convenience. Any purchases made through one of our links earns us a small commission, at no extra cost to you. As an Amazon Associate, I earn from qualifying purchases. All creative ideas and opinions expressed are purely our own. Read our full privacy policy and disclosure for more information.
Phoneme Segmentation & Blending Tips
In a recent post on The Primary Pack, I mentioned that each of my guided reading lessons is much like a workout, containing a warm-up phase, workout phase, and cool down phase. All of my alphabet, phonemic awareness, and phoneme segmentation activities take place during the warm-up phase. It is during this time that we warm up our brains before we begin reading the text.
Recommended Resources:

Decodable CVC Sliders for Segmenting & Blending Sounds | Fluency Practice

Decodable CVC Sound Boxes for Orthographic Mapping, Segmenting & Blending

Decodable CVC Word Puzzles for Short Vowels Segmenting and Blending Practice
Phoneme segmentation is the process of breaking a word apart into its individual sounds. It is the opposite of blending sounds together to form a word. However, the two often go hand-in-hand. Phoneme segmentation helps build phonemic awareness and is one of the first steps in the reading process. Oftentimes, students have difficulty orally “stretching out” a word… so we may practice this skill during the warm-up phase of our guided reading lesson. One of the best ways I have found to practice phoneme segmentation is with color coded picture and word cards, as well as with color coded manipulatives.
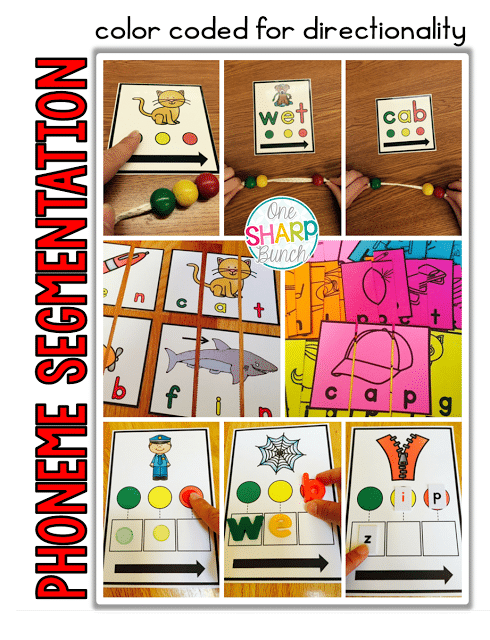
Color coding helps students easily identify the beginning, middle, and ending sounds in a word. It also helps with directionality, as it prompts the students to read from left to right.
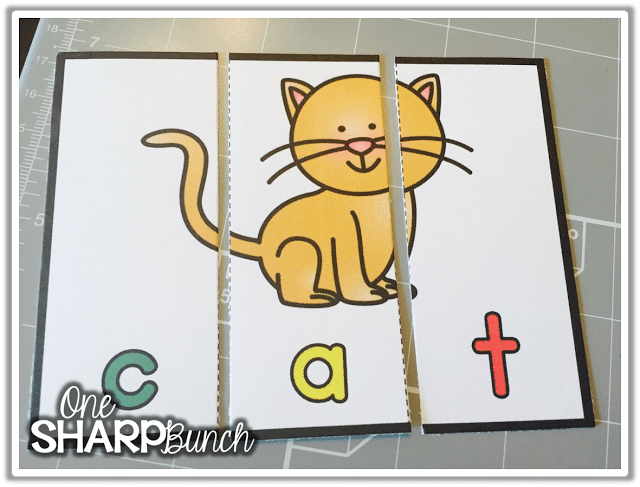
One of the first color coded phoneme segmentation activities we begin with is CVC Puzzles. As you can see, the first phoneme is colored green, the middle is yellow, and the ending is red. The broken pictures provide just right amount of support for students to be able to assemble each puzzle.
Once they have correctly assembled all three pieces, we go back and touch each letter as we say the sound. Then, we slide our finger under the completed puzzle and blend the sounds together to form the word.
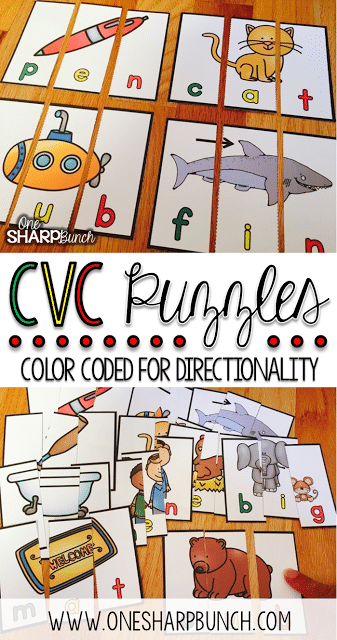
I also like to give one piece to each student, so that three students have a piece. Each student will say the sound for the letter they have… make sure the students are sitting in the correct order for the word. After saying all three sounds, they blend the sounds together to form the word. Lastly, they assemble the pieces to make the picture to see if they were correct. My kiddos love these puzzles because it is like a game to them… and who doesn’t love a game!
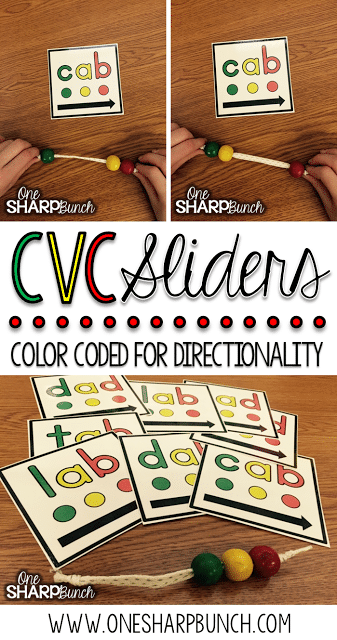
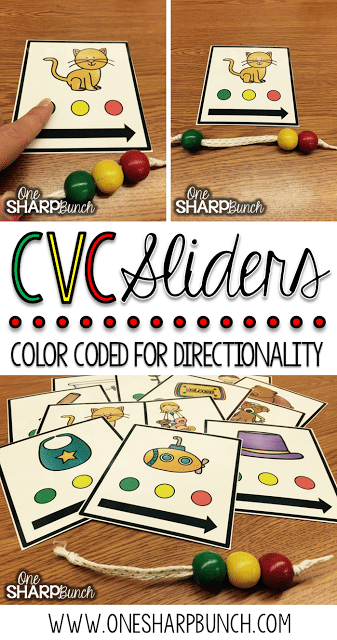
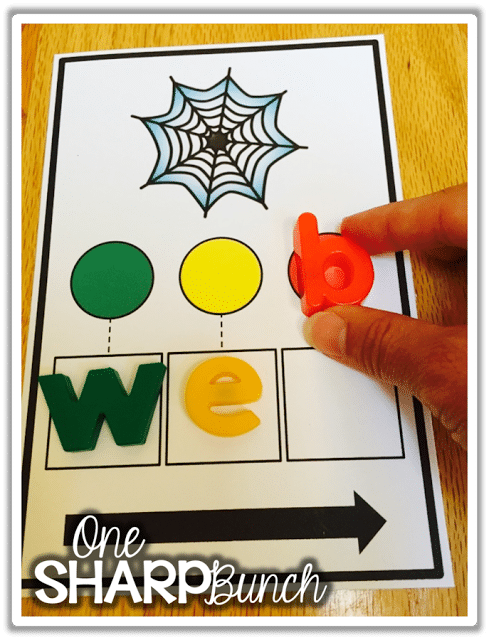
Our CVC sliders are also a big hit, since the kiddos get to slide the beads as they segment the word. Green is the beginning sound and means “go and stretch it out.” Yellow is the middle sound and means “say the sounds slowly.” Red is the ending sound and means “stop at the end of the word.”
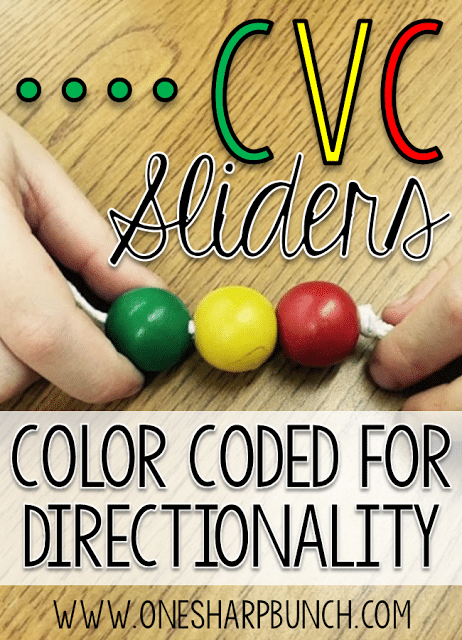
Before using these color coded CVC sliders to orally segment each word, we touch each dot on our CVC slider card. Then, we slide our finger across the arrow and blend the sounds together to form the word.
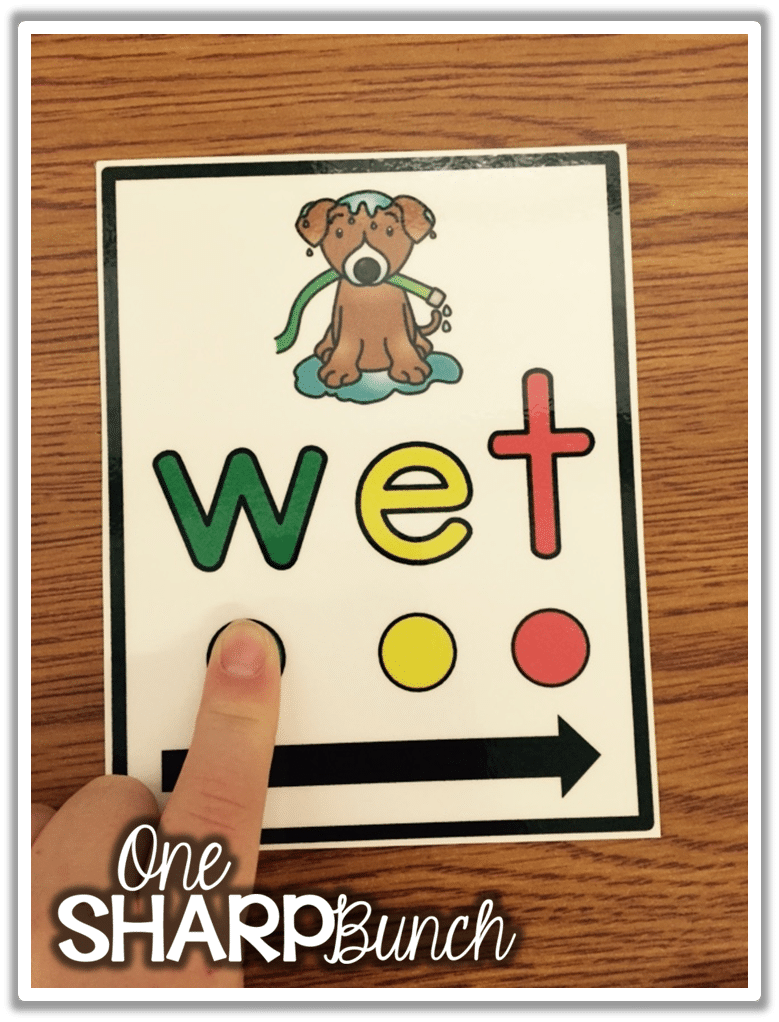
Then, it’s time to use our CVC slider as we segment the word! The students slide one bead for each phoneme in the word. After sliding all three beads and saying all three phonemes, they push the beads back and say the word. In the beginning of the year, I like to use the cards with pictures to provide extra support.
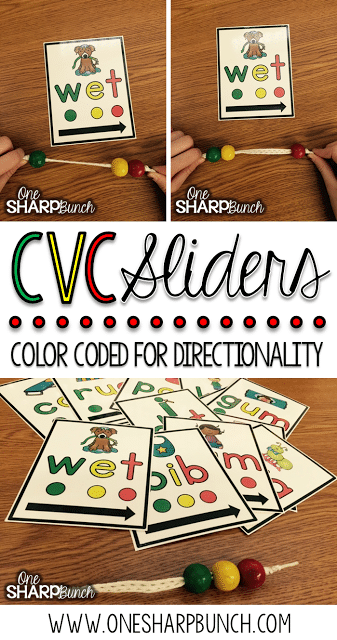
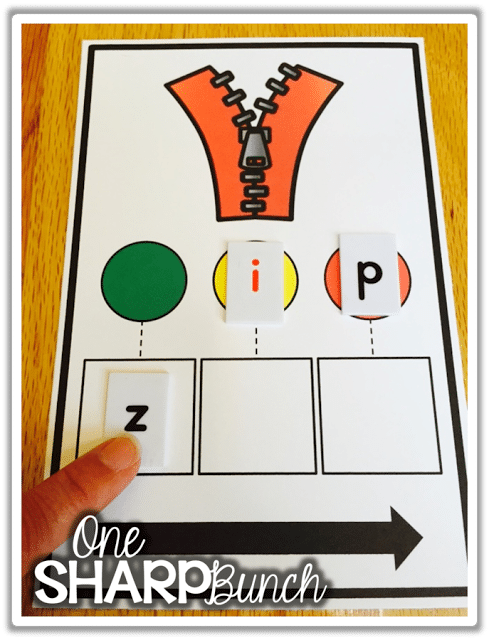
As the students become better at segmenting and blending, we will use just the color coded word cards. This is a bit more difficult, as the students are not able to rely on the picture support when blending the sounds back together.
To differentiate even further, we often use the CVC Slider picture cards. These cards require oral segmentation (without any visual support) of the word, which is a much more difficult skill.
Another color coded trick is using color coded sound chips with elkonin boxes or these CVC Boxer cards. The students begin by placing each chip in the appropriate colored circle.
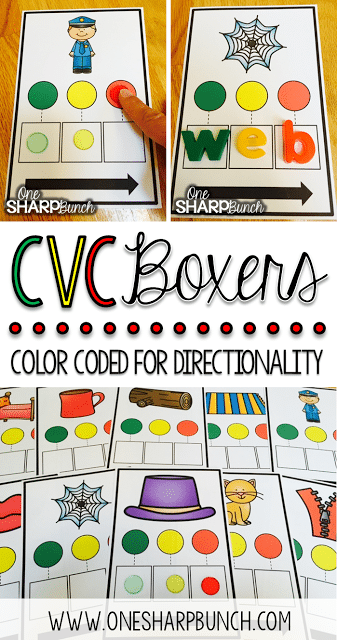
I usually use bingo chips for this activity. These actual ones came from Amazon.

The students will push one chip down into the box as they make that sound. These boxes serve as a visual, much like the puzzle pieces and CVC sliders, that the word they are segmenting has three sounds. After all three chips have been pushed into the boxes, the students slide their finger along the arrow and blend the sounds together to form the word.

As we become better with the alphabetic principle, we push magnetic letters or letter tiles as we make each sound. Sometimes, my learners who are struggling to grasp this concept actually do better pushing letters, especially since these physcial letters serve as a visual to help bridge the connection between letters and sounds.
More Phoneme Segmentation Activities
It’s important to remember that not every teaching strategy works for every student. I have found that varying these activities helps hit the individual learning styles of each of my kiddos… and that, my friend, is the most important job of teaching! With that being said, here are a few additional phoneme segmentation activities that you might find beneficial!
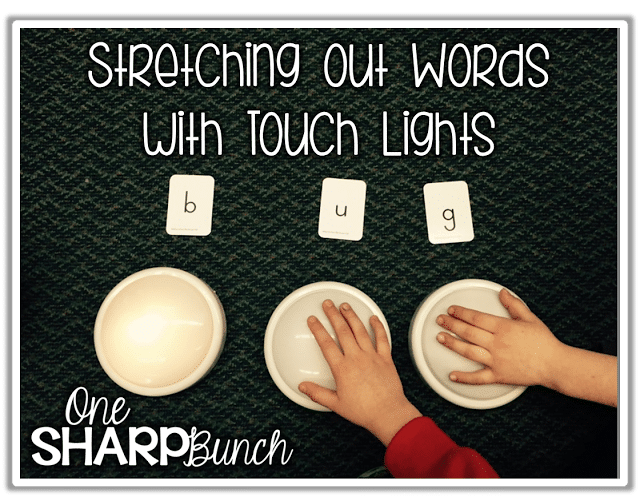
Sound lights
This is one of our favorites as well! Simply push on a light for each sound. I sometimes use letter cards placed above each light.
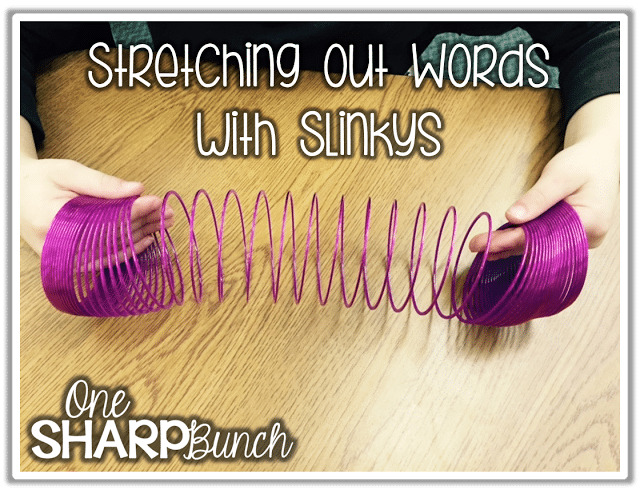
Slinkys
You can guess that the kiddos love this one too! Stretch out the slinky as you say each sound in the word. I like to have the kiddos make distinct movements for each sound… so if there are three sounds, they make the slinky bigger and bigger for each sound.
Stretchy Snake
This was an idea I saw on the fabulous Deanna Jump’s blog. We move a sound chip into the box as we say each sound.
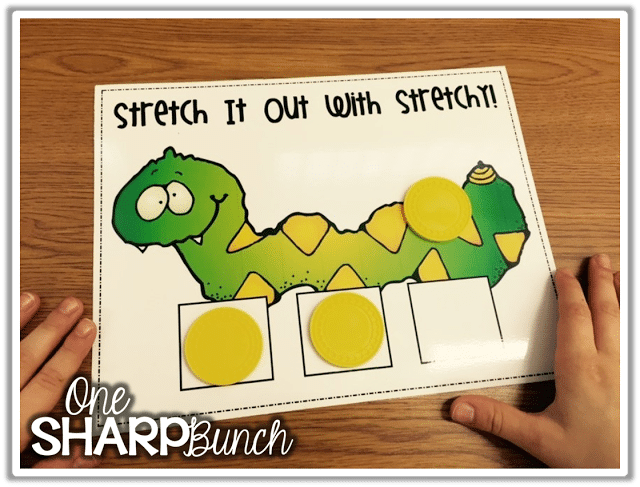
As we become better, we stretch out the word and record the sounds we hear.

So there you have it! My tips and tricks for phoneme segmentation! Keep it novel! Keep it kinesthetic! Keep it visual! I hope that you might be able to give some of these ideas a try in your classroom!
Discover more multisensory CVC word activities here!

Share this Post

Ashley Sharp
As a dedicated Kindergarten teacher for nearly 20 years, I believe the words “fun, play, and creativity” can sit right alongside the words “developmentally appropriate, engaging, and rigorous.” Learning is meant to be fun and messy!
More Posts


6 responses to “Phoneme Segmentation & Blending Made Easy”
-
Hi Ashley! This post is awesome! I do all of these same things with my Kindergarten students, but it's funny how just seeing it done by someone else brings on oodles of inspiration! Thanks!!
Jill 🙂
ABCs and Polkadots -
Love the segmenting ideas. I am going to use them with my students. Thanks for sharing.
-
Hey Ashley! I came across this post on Pinterest, and I just wanted to tell you it's nicely done! Great looking product too. Have a nice day!
Carla -
Hi Ashley,
I love your site! I really like your Stretch It Out with Stretchy" mats. Do you have it in your teachers pay teachers store? I couldn't find it.
Thanks,
Lisa
li*********@*********ls.org -
I’m curios where do you get those colored beads from that you use for segmentation?
I didn’t see them on the amazon widget. -
Hi all, I love these products! I was wondering if anyone could answer how to make those colored dots under each sound on Microsoft word? Any help would be appreciated! 🙂


Leave a Reply